Friday, April 09, 2010

Life is a Beautiful Colors

 Like many other Easter celebration day, our family gathered last weekend to Rejoice in the Day.  My grandchildren had a great time coloring eggs and enjoyed company of their uncles and great grand mother...  Life is truly a beautiful colors.  Instead of the usual ham or whatever the norm for the Easter gatherings, I decided to serve the Puff-Goes-the-Chicken Pot Pie.  We had fun making it and loved each other's company.
Decided to bake the puff pastry separately.  To serve 12, the pot pie mixtures were baked in turkey roasting pan.  Since the puff pastry depends on the its own 'steam' (from moisture) / butter to puff up, too cover such a large open moist surface over the roasting pan would be too risky.  Before the Puff could even start to bake, it would have collapsed into the pot pie and turned into a glob.  Luckily the plan worked.  For next time, it will be individual pot pie.  I am hoping to get one of those ramekins in the round shape with lion handles... something like that to make it look prettier.

Thursday, April 01, 2010

Home Baked Mediterranean Olive Bread Revisited


I had a really good day off today.  I got charged up after visiting and reading some of the other food bloggers' adventures in baking.  So, I decided to prepare three different types of bread.  I revisited our family favorite Mediterranean Olive Bread that I learned in class.  I am not in particular fond of my High Gluten flour that I bought.  It seems to make my bread texture to come out translucent in the past baking ...  I just skipped the 2nd 1 lb portion of it and just use the bread flour.
There are two challenges I want to complete in this baking - "No Knead" bread and how many days will it keep without becoming rock hard - this is achieved by adding the special ingredients I learned from some of the dear food bloggers.  (They are really great bakers!!  I am so proud of them--Happy Home Bakers, Angie's, Sea Dragon, etc, etc.)  Normally, kneading is required to make this bread - to build gluten.  Since one other bread that I am making is the infamous "No Knead Bread" recipe that my friend Debra shared with me, I want to see if the Olive Bread would turn out just as fine.
I weighed all ingredients and mixed them all together in my extra large bowl with spoon, including the new 'secret' ingredients.... ha, ha,,, when you find out what it is, you will be so mind boggled--What! that?  that's not secret? is it?  Your mom must have forgotten to pass it down.  Then, I covered it to let it rise.  After the 1st rise, then, I completed the kneading with hands.  Portion it into thirds - rather than into two's (the full recipe makes 4 loaves and I used half batch) because I got three special munchkins to give to.  The result:  very good.
(*Double Click on the image to enlarge.)

Monday, March 29, 2010

Puff-Goes-the-Chicken Pot Pies Adventure

So, March came quietly and is almost gone.  I have been very busy with school work assignments and testing them at home before the class - whenever possible.  Luckily this recipe is a winner - Curry Chicken Pot Pie (www.foodnetwork.com - Alton Brown's).  I added my own favorite vegetables or seafood (shrimps), and they all turned out delicious.  My family loves them.
The only tricky part with this chicken pot pie is the Puff Pastry (Bo Friberg's "The Professional  Pastry Chef", 4th ed.  I make only 1/2 batch).  How can you keep the puff pastry from getting soggy bottom and keep the rise.  After my first pot pies, I immediately thought of freezing the Puff tops; then also the temptation to make it more 'soupy' is not too great an idea.  The Puff pastry top didn't like too much 'moisture' underneath.  Draping the sides over the ramekin helped some, but freezing the puff tops and baking at 425'F helped in baking beautifully.
Other than that, I baked 8 to 16 pot pies each week for the past 3 weeks, and they turned out great.  Delicious!
(*Double click on images to view larger image.)

Monday, March 08, 2010

SOFT NOUGAT ISLANDS

I was looking for a recipe for Soft Nougat filling for making Chocolate confection.  My friend found a recipe called Nougat Centers.  I gave it a try.  It is good.
The white blob you see in the picture is the original soft nougat center.  For variation I added walnuts, raisins, candied cherries, and rum.  But the candied cherries didn't have distinct flavor, so I added maraschino cherries, marachino juice + rum.  That's the pink blob you see on the plate.  If you like maraschino cherries, then this is good.  The other pink blob is with extra chopped raisins and maraschino juice with rum. 
 
Squeeze the parchment paper to separate the chocolate cup off of it.
This nougat is mixed with melted milk chocolate.  Then fill with nougat with cherries...

Canneles de Bordeaux - Delicious!

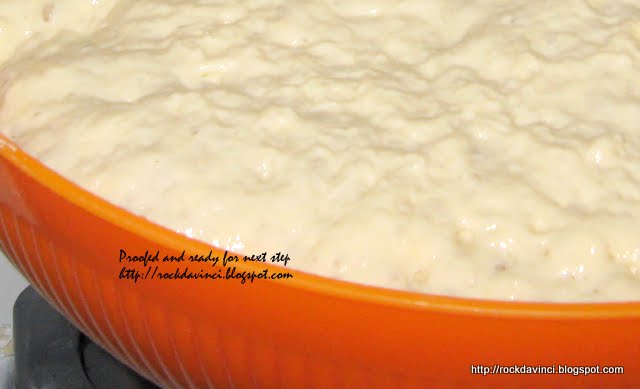
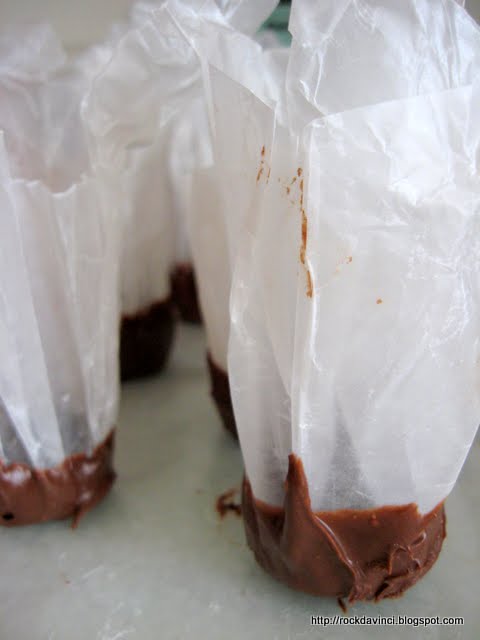
After acquiring a copy of soft nougat center recipe from Debra, my friend on Thursday evening, I decided to test it out right away on Friday.    As I have never made nougat before, I was very delighted when Debra said she is coming to stop by.  Then, we got talking about our good ole' Canneles de Bordeaux and this "Polytech 'Lille".  (http://caneleiaal.free.fr)    A group of students who conducted study and reported on their in depth testings and findings on How To's of Le Canele de Bordeaux.    We read it ones together back in 2007, but this time I listened more intentively.    There's the reasonings for why scalding the milk - to infuse vanilla bean, why use the rhum vieux agricole, why or why not of refrigerating for 12 hours, etc, silicone mold vs, copper, and aluminum, etc.   Well, my soft nougat turned out successfully and my family members validated them over the weekends, but tonight... well, last night I decided to venture one more time in the baking the second batch of Canneles de Bordeaux for year 2010. And what a great joy and satisfaction.   This time around, it passed my sight, texture, taste, aroma, and clean kitchen test.  Bees wax and butter mixture for the molds in the past is something you would think twice of if the product didn't turn out the way it should. They can be messy to clean after.
  As mentioned in my past blog on Canneles, the ingredients are so simple, but yet, the baking them is extremely challenging.  This time, I got 'the' best result compared to the ones in the past.
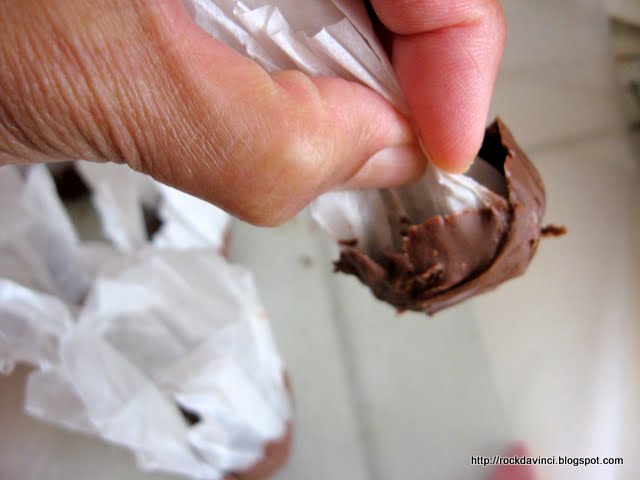
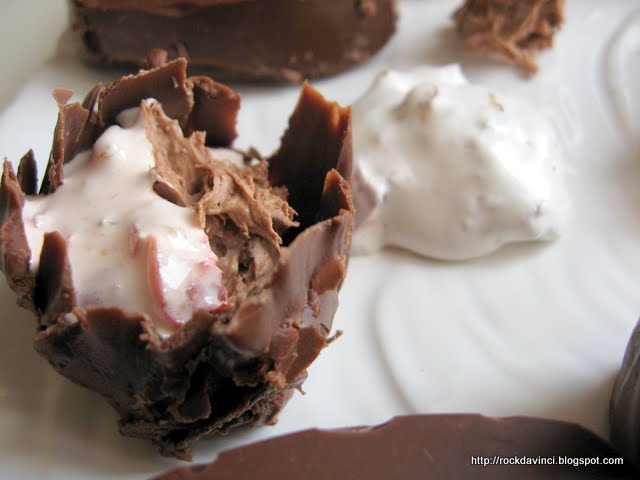
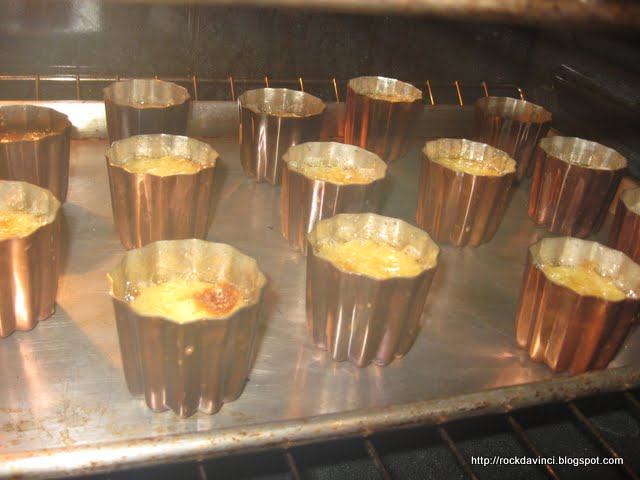
Outer shells are nice dark brown.    A couple of them in the back of the oven turned close to 'burnt' looking, but when I tasted, it was so delicious.  And also figured out how to get this RUM aroma I love so much in Cannele at its best.    Thank you Debra for your visit Friday nite, it paid off.
 
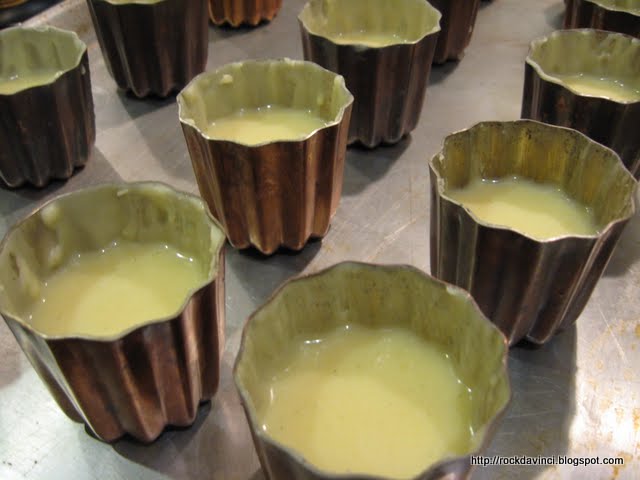
As cannele is quite sweet, I decided to fill the molds only to half way rather than the usual three-fourth.   This prevented the batter to rise afloat above the rim of the mold (normal, during baking), thus, minimized/prevented bees wax+butter coating in the molds to spill out to the baking sheet.
It was the best idea.  Also, this produced two-bite size Canneles that is more appealing.   And I am sure my family would love that, too.
This time I decided not to indulge in my Madagascar vanilla paste and only use 1 tsp of it rather the usual 1 Tbsp that I like.  
Can't wait till morning, . . . I can have one in the morning for breakfast.