Sunday, March 17, 2013

Lion Head - Pork Meatballs Stew

It's getting a bit challenging trying to translate or interpret some of our family's favorite dishes.  The LION HEAD is a description of well seared large pork meatballs, then simmered with Chinese Nappa Cabbage - BAI TSAI, dried SHIITAKE - DONG GU, Firm TOFU, Bean thread,... It's our father's favorite dish.
My mother makes it the best.  And here is mine. 
I made enough to serve 4.
Ingredients: 
1 Quart Chicken Stock - home made & pre-frozen
2 C to 4 C water - (2 Cups come from the hydrated dried mushroom below)
3 hydrated SHIITAKE - dried Chinese mushrooms - Microwave it with enough water to cover the mushrooms (leave a small plate on top to keep the mushroom in the liquid.)  Place the bowl over a microwave tray to catch spilling liquid.  Bring the water to boil. Remove from microwave and set aside to hydrate in liquid.  *transfer liquid to the pot when ready to add mushroom into the stew
1-1/4 lb of ground Pork - fatty pork is preferred, but mine is 95% lean.
130 grams - 1 small can - water Chestnut (discard liquid and washed & rinsed well) - chopped
3 grams of minced fresh Ginger (Tip:  cut and prepare fresh ginger into various size and Freeze them in plastic bag.  Use the ones you want.)
1 Large egg
32 grams of chopped green onions - about 3 slender American green onions - Stir Fried in teaspoon of Olive Oil till browned.
Salt to taste - at least 1 to 2 tsp will be used in meat - Tip:  season the liquid as you go.
White ground pepper.
(Click on any of the pictures to view in larger size.)
 Water chestnuts are my father's idea.  He told me that since our ground pork is so lean, add chopped water chestnuts to give the nice fluffiness and at the same time it gives the enjoyable crispness.   Normally you would put the fresh chopped green onions, but I wanted to try with pre-stir fried green onions.
 Mix well by tossing motion.  Do no stir crazy in circling motion with the chop sticks or spoon.  That will make the meatball 'tough', unless your intention is to make the meatballs with gelatinized texture.
 Instead of pan frying the meatballs because I do not have the normal rounded end cone shaped Chinese iron WOK like my mothers, which will keep the rounded shape of the meat as they fry, I decided to test my new tool - meatball baker pan (I got it from the AVON catalog.) 
 If the pork is really fatty, this would really helped in getting rid of the extra fat.  But on the other hand, normally when pan fried in the Wok, some of the fats are left in the Wok to complete the stew, and it gives a lots of flavor.
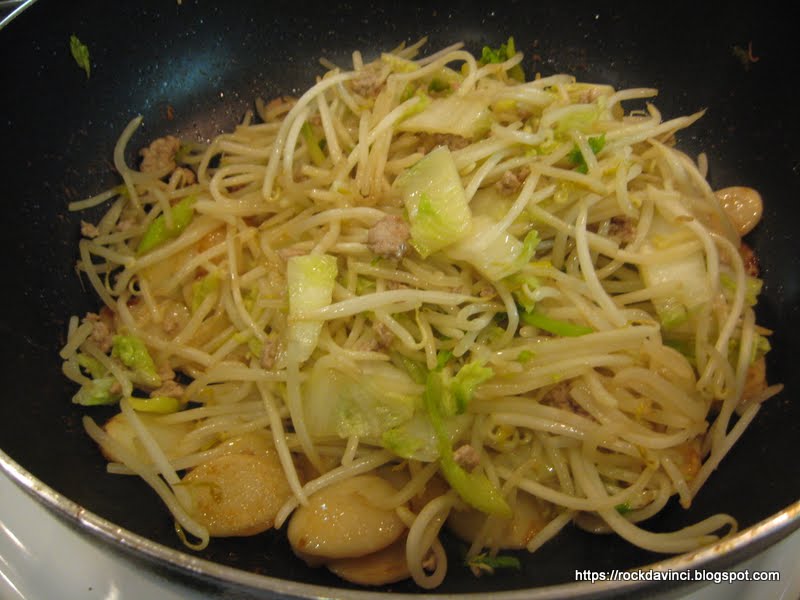
 Here is the hydrated mushrooms.  I only used three.  Cut them into quarters.  Add to the stew.  Wash and rinse the Chinese Nappa Cabbage well.  Cut the broad leaf into halves - lengthwise.  Then cut into 2 to 3-inch chunks side ways.  Add Nappa Cabbage into stew. 
Open up your Firm or extra Firm TOFU package.  Drain the liquid.  Set the TOFU on a plate with rim or bowl and place a plate on it to extract some more water.  Drain.  Repeat 2 times.
Cut into nice large chunks.... like 1-1/2 inch size.
Add salt and white ground pepper to the soup, as needed.
** Be aware of the "fake" Bean thread vermicelli.  This one I have turned out to be it!  I forgot that the good bean thread vermicelli in this brand is always "individually" wrapped and tied close in red and white ribbon.  This one is in one whole plastic bag.  Also, the good bean thread vermicelli's brand has blue coloring on the plastic wrap at one end.   I totally forgot to be careful when I purchased it.   The whole thing turned into glue like when added to the stew. 

To hydrate bean thread, add the bean thread vermicelli into a bowl of hot boiling water.  In this one, I just took out the mushrooms and quartered it and added to the stew.  Then, I reboiled the liquid in the microwave and added the bean thread vermicelli.  When soft, use scissors and cut the both ends of the vermicelli, so it will not be toooooo loooong.
 Add the bean thread vermicelli at the end  - like three minutes before serving.  Otherwise, you will not find them - all dissolved into the soup.

Serve with soy sauce as dipping sauce.


Thursday, March 14, 2013

TSAO NIEaN GAO - Stir Fried Rice Cake

TSAO NIEaN GAO is one of our family's favorites - and especially my father's 'snack' food.  The ingredients are package of dry Glutinous Rice "medallion" cake (usually found in the cold food section together with TOFU or Noodles in the Asian food market.  "NIEaN GAO" itself means YEAR Cake, savory flavor.  And we eat them anytime throughout the year.


Ingredients: 
1 package Rice Cake - I find the Korean type Rice Cake very good.
1/2 Cup Celery stalks - chopped
1/4 Cup Green onions - chopped
Nappa Cabbage - sliced lengthwise, then, cut into 3" strips
1 package Bean Sprouts or 5 Cups
1/4 Cup Ground pork
Cooking oil - 4 Tb
2 tsp soy sauce
1 tsp sugar
Salt
white ground pepper
 Wash the bean sprouts in a large bowl thoroughly to get rid of "these unknown acidic odor" - they are disgusting.  I don't know how they grow bean sprouts now a-days, but after washing them with a tablespoon of salt.  Rinse them and let them soak in clean water for about 10 minutes.  Then, strain them well.  Set Aside till needed.
  In a pot of hot boiling water, cook the Rice cake medallion until soft.
 As they started to cook, the rice medallion will start to rise to the top and water will come to boil.  Cook for 1 minute.  Remove from heat.  Leave them sitting in the strainer in the water to keep from stuck to each other into one big glue.
 Quickly stir fry the ground pork in a Tablespoon of oil.  (Make sure the wok - Teflon coated or stainless steel or iron wok -  is quite HOT before adding the oil; and add the pork after the oil is glistening.) Stir fry the pork quickly and set aside quickly.  Some pink at this point is okay.
 Add green onions first and stir fry and bring the flavor out.  Add celery - stir fry 30 seconds.  Add Nappa cabbage and stir fry them well for 2 minutes.  Then add bean sprouts.  Stir fry for another minute. Add cooked pork meat and mix well.   Remove from heat, but reserve any liquid behind in the wok.  Set the vegetable mixture aside.
 Add 2 Tablespoon of cooking oil to the liquid.
Add 1 tsp of soy sauce first, sugar, salt, and white ground pepper.  Taste test.  Add more soy sauce if needed or salt or sugar to balance the taste.
 Strain the cooked Rice cake and add to the Wok.  Add some water if needed.  I added 1/4 cup water.  I need to infuse the flavor into the rice cake at this time.  Cook down the liquid. Stirring occasionally to unstick some of the rice cakes that are stuck to each other..
 Medium high heat - Cook down the liquid.  And allow to caramelize the sauce onto the rice cake.  Medium heat - Do not stir the rice cake any more, but occasionally lift some to check if browning is happening.
If you have a Teflon coated Wok, be mindful of the temperature.  Preferred cooking ware for Chinese cooking is the old fashion iron Wok, but if you have a Teflon coated wok, watch the temperature carefully, do not leave on high or medium high heat too long.
 Add the vegetable mixture back and incorporate with the rice cake medallions.   Taste and add any seasoning, if needed.
  This one looks better?
 or this one looks better?  ... naaaa... it's the same! 
Enjoy!  and an hour later, my father would say, "it's time to eat FUN (rice)".  Meaning it's time for dinner.  Don't let Mom hear that.   Just go cook rice..... :-)

Chinese New Year Cake

Chinese New Year Cake came quickly and brought many happy thoughts.  It brought quite a few fond memories in our life as family having lived in different countries.  Chinese New Year Cake is one of the favorite items that my mother has been preparing for us since we left South Viet-Nam.  Back then, we just go out and select and buy the ones we like best from the local street merchants and markets.  Sometimes, we thought, "it's too much."  But when we heard that she wasn't making it this year -- we Panicked!!  So, I stepped in and made some.

Ingredients to the first group of Chinese New Year Cakes were made from:
6 Cups of Glutinous Rice powder --- One and half packages of "Glutinous Rice" Powder - It's normally packaged in "Green" writing.  The package with the red writing is "Rice Powder".  (By the way, the Rice Powder is great to use on the baking peel to transfer bread into baking stone.)
2 Cups of brown sugar - Whole package of Asian Brown Sugar (in the picture below.)
Sweet Jujube (pictured below -- worded "honeyed Date" << date is the straight translation
And 2 Cups boiling wate
Equipment:
Greased parchment paper.
Large top pot large enough to hold one Large bamboo steamer.
Or use Stainless steamer.
Bamboo steamer is really a preferred steamer.  The bamboo steamer allows the steam to escape upward evenly and steams the product without causing the steam droplets to accumulate on the food to make them 'watery'.

If you are using the parchment paper to line the cake mold, please remember to grease them with vegalene spray or vegetable oil.  I did not think about this until after completing the cake.  While the normal recipe calls to use the plastic wrap, please don't.  Unless you are using a heavy duty Food Grade certified non-leaching plastic wrap and PVC free, etc, please use something else.   Oiled/greased baking pan would have worked as well to slide out the steamed sticky cake.  Here, I used the parchment paper, but please don't forget to grease it with vegetable cooking oil.
Prepare 3 removable bottom 4" cake molds lined with greased parchment paper.
You see four cake molds below, but one of them is aluminum pie tin.  To make a nice 2 to 2-1/4" height cake, you only can fill three molds with this recipe.  Otherwise, you can make one gigantic round cake - 12-inch cake mold - the size of your bamboo steamer.
 Boil water and remove from heat and dissolve the brown sugar in it.  Let it cool for 5 to 10 minutes - depending on your kitchen temperature.  Because you will be mixing it into the glutinous rice powder, and you do not want to burn your hand while mixing it.  But the sugar water should be hot enough to dissolve the glutinous rice powder and for your hand to handle, but not cold.
 Bring the steam's water to full boil.
 Mix the glutinous rice powder with your brown sugar water.
Mix well to form into good smooth paste.
 Sweet Jujubes - about a cup or so - enough to make the decoration on the top.


 6 Cups of Glutinous Rice is enough to make 3 rounds of 4" Cake mold size and one pie tin mold.   or 3 full 4" cake mold.    These cake mold's bottoms are removable.  It will be easier to push the cake out when done.


 Steam for 2 hours over high heat.
And warning!! have at least 4 cups of HOT  water ready at 1 hour of steaming and check the boiling water level of the pot.   Replenish the pot with HOT boiling water!!

New Year Cake type #2
 While the first group of the New Year Cakes were being steam, I started to work on the variation type #2 that I concocted - using Microwave.
Ingredients are 1 package and Half of the "Glutinous Rice"; 1 Cup Dark brown sugar + 1 Cup regular sugar.
And add it to 2 Cups hot boiling water.
 Bring the water into boil - turn off the heat and add sugar to dissolve.
 Let the boiling water to cool off for 5 minutes.  Add to "Glutinous Rice Powder" in a large mixing bowl.  Mix well to form paste.
 Place in a microwaveable bowl.  Put all the goodies you want.
I put sweet Jujube, chopped - pressed down and covered with the mixed glutinous rice, then, topped with Jujube sliced lengthwise.  The other half is filled with sweetened Taro root paste.  (from my other blog:  http://rockdavinci.blogspot.com/2010/09/mochi-mooncakes-with-taro-filling.html)
Taro root filling:
300 g  Pre-peeled Large Taro, cut into small chunks and cooked (microwaved), and mashed
2 Tbsp Milk
1/2 C sugar

Method:
Microwave the Taro root chunks on a plate with 1 Tbsp of water and covered with microwave plastic cover shield.  Use "potato" setting to cook till tender.  Stir from time to time to make sure that they are cooked evenly and not overcooked to become 'petrified'.
Remove from the microwave and let it steam for few minutes without uncovering.
Add all ingredients in the food processor.  Process until it becomes paste like consistency.


Press the Taro paste down and cover also with the rice mixture.


Place the bowl on the microwaveable tray filled with 1/4 cup of water and cover with microwaveable lid.  The microwaveable tray also helps in safely removing the hot bowl from the microwave.  Especially the "glass" bowl like the ones that I am using.
Please be careful when using the glass bowl that will be cooking to high temp.  If it's surface touches the "cold" anything, it will crack. 
 Let's see how it goes!

 Seems to be forming....
 Seems to be gelatinizing...
 Seems to  be cooking...
 Ah!, the other cakes are done!  
 Well, the Microwaved cake looks very wrinkly - not enough steam to cook it through (translucent) and raise it.
 All right, back to the drawing board.
To save the microwave flopped cake, I transferred the cake onto a large ceramic plate (heat resistant) or I guess you could place it on top of a cheese cloth that is oiled.  I know that in the recipe book, it says to use the plastic wrap, but I don't think those plastic wraps are PVC safe or meant to be cooked in high heat like 'steaming'.  So, if you are using the plastic to cook -- just because your mother has been using it and others... please make sure it is food grade and health safe.
Then, placed in a larger size stainless steel  steamer to accommodate the plate size that the cake is placed on.    Steam cook until the cake is transluscent - about an hour.

And warning!! have at least 4 cups of HOT  water ready at 1 hour of steaming and check the boiling water level of the pot.   Replenish the pot with HOT boiling water!!

Voila!  the cake is SAVED!
 Use knife to slide around the edge to release the side of the cake from the steamer - Do this while the cake is still piping hot.   Let it cool for about 5 minutes.  Then, take it out to cool completely before eating. 

 Yeah, right.... cool completely - it will take another 2 hours before it cools off completely - can't wait.  While it is still warm, I sliced piece of this.  I know how the Jujube side taste because that's my favorite side.  I sliced the Taro root filled side of the cake.
Bomb!  I love it !!! It taste soooo goooey and delicious  !!   And, yes, I went and delivered them to my mother and families.